
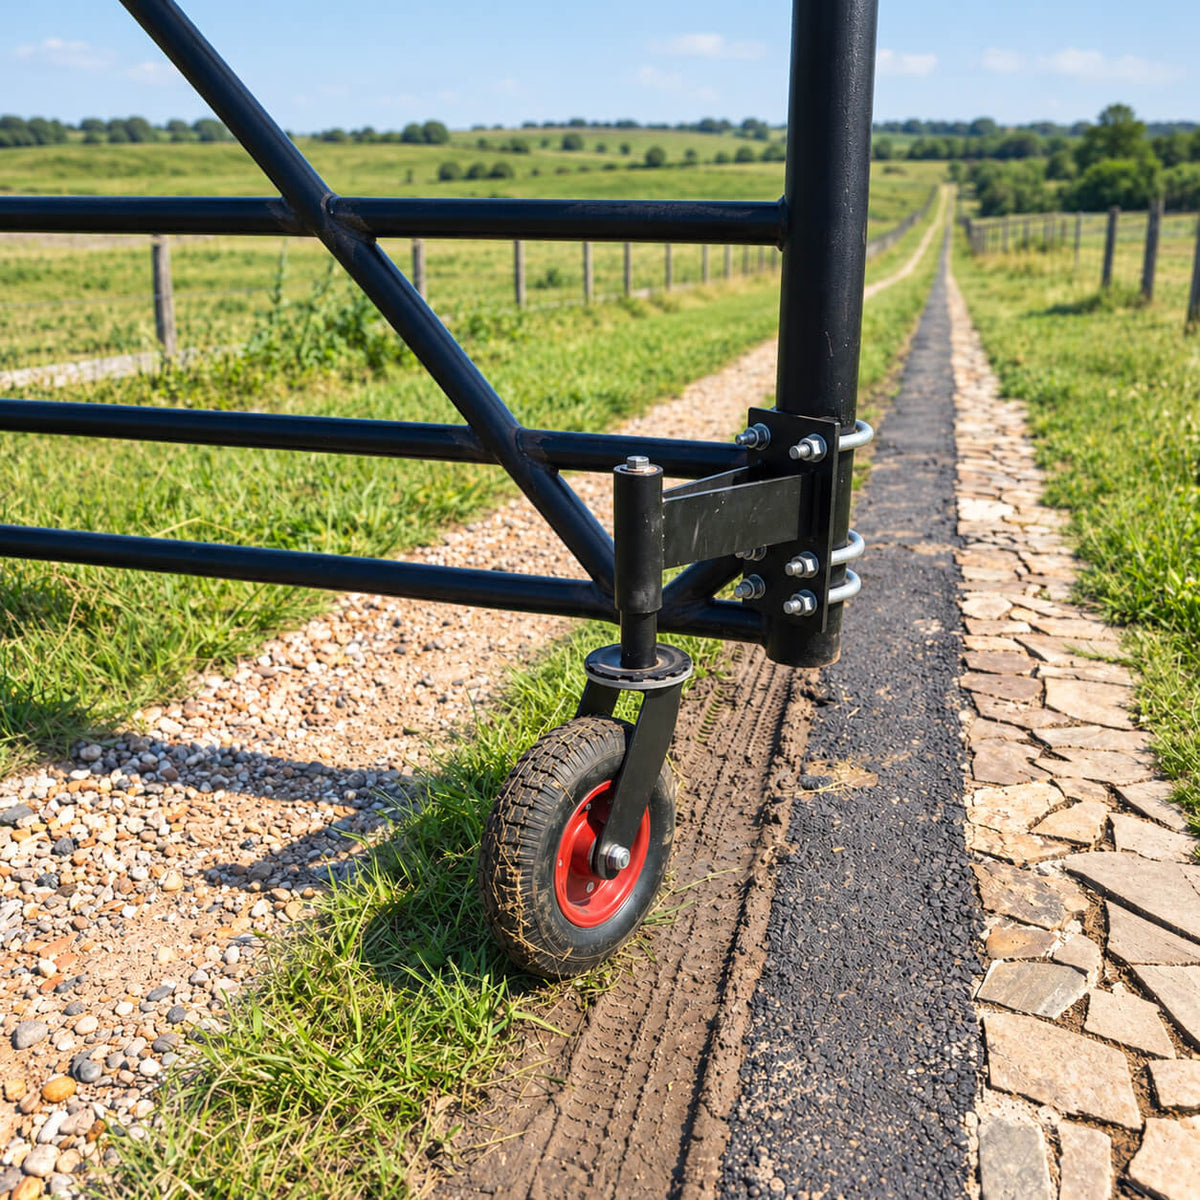
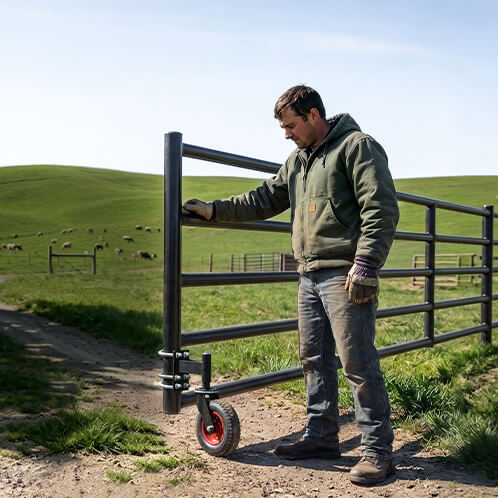
A spring-loaded gate wheel helps support the free end of a heavy gate as it opens and closes. When properly installed, it can help reduce gate dragging, relieve stress on the hinges, and improve movement over uneven outdoor surfaces.
This guide explains how to install an 8 in spring-loaded gate wheel on compatible wood gates and round or square metal tube gates.
Before You Begin
Before installation, confirm that the gate wheel is suitable for your gate.
Check the following:
-
The gate frame is structurally sound.
-
The hinges and gate post are secure.
-
The gate has enough ground clearance for an 8 in wheel.
-
The mounting area is strong enough to support the bracket.
-
The wheel's 750 lb capacity meets your gate's support requirements.
-
The wheel can travel across the ground surface without obstruction.
A gate wheel is designed to provide added support. It should not be used to compensate for broken hinges, a leaning post, or a severely damaged gate frame.
What You Will Need
The gate wheel kit includes:
-
6 hex bolts, nuts, and washers for wood gate installation
-
3 U-bolts for compatible round or square metal gate frames
-
Dual open-ended wrench
You may also need a tape measure, marker, level, drill, drill bit, and a second person or temporary support to hold a heavy gate safely during installation.

Choose the Correct Mounting Position
Mount the gate wheel near the free end of the gate, opposite the hinges. This is the area that typically experiences the most downward force and is most likely to drag.
Keep these points in mind:
-
Install the bracket on a solid, reinforced section of the gate frame.
-
Position the wheel so it rolls in the same direction as the gate travel.
-
Avoid placing the wheel where it will interfere with latches, braces, or gate hardware.
-
Do not lift the gate too high during installation. The wheel should support the gate, while the hinges continue to carry the gate correctly.
Close the gate and check the ground level at the intended mounting position before drilling or tightening any hardware.
Install on a Wood Gate
-
Hold the mounting plate against the wood gate frame near the free end of the gate.
-
Use a level to align the bracket vertically. Mark the bolt-hole locations.
-
Drill pilot holes through the mounting area as needed.
-
Insert the supplied hex bolts through the mounting plate and gate frame.
-
Add the washers and nuts on the opposite side of the gate frame.
-
Tighten the hardware evenly until the bracket is secure. Do not overtighten and crush or split the wood.
-
Confirm that the wheel reaches the ground and that the gate can move freely.
For the strongest installation, mount the bracket through a solid structural section of the gate rather than thin boards or decorative panels.
Install on a Metal Tube Gate
-
Hold the mounting plate against a round or square metal tube near the free end of the gate.
-
Position the bracket vertically and make sure the wheel has clear contact with the ground.
-
Place each U-bolt around the gate tube and guide the threaded ends through the matching holes in the mounting plate.
-
Install the washers and nuts.
-
Tighten each U-bolt gradually and evenly so the bracket sits firmly against the frame.
-
Check that the bracket does not shift or rotate on the tube.
The included U-bolts are intended for compatible round or square metal gate frames. Verify the tube size and available mounting space before installation.
Set the Wheel Height
After the bracket is secured, open and close the gate slowly.
The solid rubber wheel should touch the ground and support the free end of the gate without lifting the gate off its normal hinge position. The built-in spring has approximately 1-7/8 in of travel to respond to minor changes in ground level.
Make sure that:
-
The gate does not scrape the ground.
-
The wheel rolls freely throughout the gate's travel.
-
The spring has room to compress over uneven surfaces.
-
The wheel does not force the gate upward or place the hinges under unusual tension.
Test the Gate
Open and close the gate several times after installation.
Check for smooth movement over the full path, especially across gravel, grass, dirt, concrete, or sloped sections of the driveway. Recheck all fasteners after the first few uses and tighten them if needed.
Common Installation Issues
The Wheel Does Not Touch the Ground
Check the mounting height and make sure the gate has not been lifted too high. The wheel must contact the surface to support the gate.
The Gate Still Drags
Inspect the hinges, gate frame, and post. A wheel can provide added support, but it cannot correct a broken hinge, leaning post, or warped gate structure.
The Bracket Moves on a Metal Frame
Make sure the U-bolts are correctly positioned and tightened evenly. Confirm that the U-bolts fit the gate tube size.
The Gate Is Hard to Roll
Inspect the travel path for stones, deep ruts, debris, or changes in surface height. Uneven terrain may increase rolling resistance.
Support Heavy Gates With Less Drag
An 8 in spring-loaded gate wheel with a solid rubber, flat-free tire provides dependable support for compatible heavy wood and metal gates. Its swivel design helps follow the gate's movement, while the enclosed spring helps manage minor changes in ground level.



How to Level a Workbench With Leveling Casters